
Creating the Reply With Meeting OL2007 Add-In (Part 1)
Filed under: Development
Note: This is the first part, in a multi-part series to create this add-in. I chose to break this up into multiple parts so some parts (like this one) could be used by anyone creating an add-in. This post will only create the add-in shell and will not show how to reply with a meeting. that piece will come in Part 2.
I have spent many years working with Microsoft Outlook add-ins and want to share some of my experience with other developers. Since Microsoft Outlook 2000, an API has been available for Office and all of its components. I have mostly focused on Microsoft Outlook over the years, so this post will demonstrate how to create a Microsoft Outlook add-in. More specifically, I will focus on Microsoft Outlook 2007 and use Visual Studio 2008 with C# to create the add-in. This post will show the initial creation of the project and the beginning of the add-in. I will have other posts to enhance the add-in. I chose this feature because it is included in Microsoft Outlook 2010.
Creating the Solution
The first step to creating the add-in is to open Visual Studio 2008 and select a new Project (Figure 1). The add-in will be named “ReplyWithMeetingAddInâ€.
Figure 1 (click to enlarge)

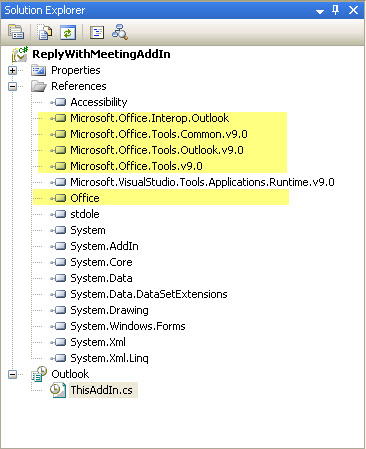
Once the project is created, there are a few items to notice. First, Visual Studio has already added the needed references to create the add-in. Figure 2 shows these references highlighted. The second file to notice is the main add-in file that was created, ThisAddIn.cs. This is the gateway to your add-in from Outlook.
Figure 2
Building the Add-in
At this point, we can build the add-in. Doing this will automatically install it into your Outlook 2007 application, although at this point the add-in doesn’t do anything. It is good to see that the add-in is present though. Here are the steps to verify that it installed into Outlook:
- Build the project from within Visual Studio by Right-clicking the project and selecting Build.
- Once the build has succeeded, restart Outlook (this is important!).
- In Outlook, click the Tools…Trust Center menu option.
- Select the Add-ins tab in the Trust Center (Figure 3).
- You should see your add-in listed in the Active Application Add-ins
Figure 3 (click to enlarge)

Writing the Add-in
The guts of the add-in start in the ThisAddIn.cs file, as mentioned above. This file initially has 2 events exposed (see Code 1).
- public partial class ThisAddIn
- Â Â Â Â {
- Â Â Â Â Â Â Â Â private void ThisAddIn_Startup(object sender, System.EventArgs e)
- Â Â Â Â Â Â Â Â {
- Â Â Â Â Â Â Â Â }
- Â Â Â Â Â Â Â Â private void ThisAddIn_Shutdown(object sender, System.EventArgs e)
- Â Â Â Â Â Â Â Â {
- Â Â Â Â Â Â Â Â }
ThisAddIn_Startup is used to initialize your add-in. Here you can create buttons for your add-in or link to other events within Outlook. An example would be to put System.Windows.Forms.MessageBox.Show(“Helloâ€); in this method. When outlook starts up, it will show a messagebox with your message.
ThisAddIn_Shutdown is used to clean up any resources you have used. Maybe you need to remove the buttons you created, or close down a data connection.
In Part 2 of this series, I will show the code to make the add-in useful. The add-in will be enhanced to add a button to the Main Outlook window and an email message window.
Debugging the Add-in
One of the great things about developing add-ins with Visual Studio 2008 is that debugging is easy to set up. The key to debugging the add-in is to setting Outlook as the startup action for the project. To do this, follow these steps:
- Double-click the properties for the project.
- Select the Debug tab.
- In the Start Action section, select the Start external program radio button.
- Browse to the Outlook.exe file (usually located at: C:\Program Files\Microsoft Office\Office12\OUTLOOK.EXE)
Now, when you run the add-in from within Visual Studio, it will start Outlook automatically. This will attack the debugger and you can set breakpoints just like any other application.
Wrap Up
This post shows the basic steps to create a Microsoft Outlook 2007 add-in with Visual Studio 2008. At this point, the add-in doesn’t do anything, but this is the same process every add-in starts with. In the next post, I will add the code to load the buttons into outlook so the user can reply to a message with a meeting request.
Disclaimer: This code is provided as-is. There is no guarantee to the accuracy of this information. Use this information at your own risk.
Follow Us